Newnum and Sons Garage

How Often To Change Transmission Fluid For A Smoother, Longer-Lasting Ride

How Often To Change Transmission Fluid For A Smoother, Longer-Lasting Ride

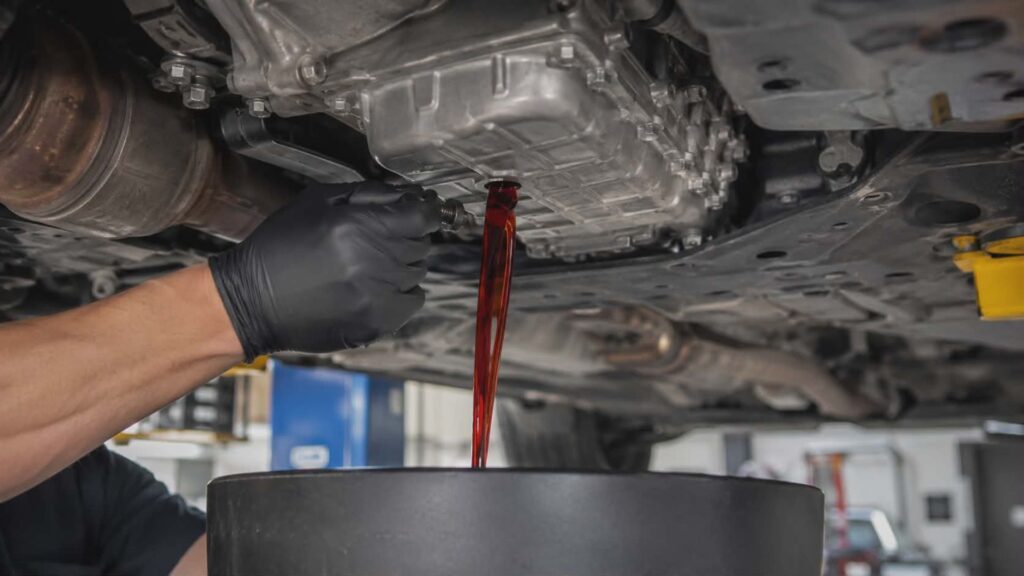
How Often To Change Transmission Fluid For A Smoother, Longer-Lasting Ride Your transmission works incredibly hard every time you drive. It shifts gears, manages hydraulic pressure, and keeps power flowing from your engine to your wheels. But without clean fluid doing its job, all of those moving parts start wearing down faster than they should. So how often should you actually change transmission fluid? The honest answer is: it depends.  But that does not mean you should guess. What Transmission Fluid Actually Does Transmission fluid does more than just lubricate. It acts as a hydraulic fluid that enables gear shifts, helps regulate temperature, and forms a protective layer over internal components to reduce wear. Over time, that fluid loses its effectiveness. The fluid oxidizes, picks up debris, and turns from bright red to a dark, dirty color. When old fluid breaks down, it can no longer properly protect your transmission or maintain the viscosity needed to keep things running smoothly. Think of it like engine oil. You would not skip oil changes and expect your engine to last. The same logic applies here. Recommended Transmission Fluid Change Intervals There is no single universal answer, but here are the most common guidelines: Automatic transmission: Most manufacturers recommend changing automatic transmission fluid (ATF) every 30k miles to 60k miles under normal driving conditions. Manual transmissions: These typically need a fluid change every 30,000 to 60,000 miles, though some can go longer. CVT (continuously variable transmission): CVT fluid often has a drain interval between 50,000 and 60,000 miles, but check your owner’s manual since recommendations vary by make and model. Some manufacturers label their fluid as “lifetime,” but automotive technicians will tell you that real-world conditions – like towing and hauling, stop-and-go traffic, and heat generated by heavy-duty use – shorten that lifespan significantly. When To Change Transmission Fluid Sooner Your service interval should move up if you regularly tow a trailer, haul heavy loads, or drive in extreme temperatures. These conditions cause the fluid to break down faster and create sludge and contaminant buildup inside the transmission. A vehicle that sits mostly in city traffic will also need more frequent attention than one driven on open highways. Heat is the biggest enemy here, and city driving generates a lot of it. Signs That Your Transmission Fluid Needs Attention Do not wait for a problem to check the fluid. But if you notice rough shifting, a delay when you accelerate, or a burning smell, those are red flags. A transmission flush or drain and fill service may be exactly what your car needs before a small issue becomes a costly repair. Some vehicles do not have a dipstick, so check your owner’s manual and have a technician inspect the fluid at a service center. Do Not Ignore Your Transmission Skipping a transmission fluid change is one of the easiest ways to end up with a major repair bill.  If the transmission fails, you are looking at one of the most expensive repairs in all of automotive maintenance. No amount of transmission fluid myths or Toyota “lifetime fluid” marketing changes that reality. Regular maintenance is how you protect your investment. Keep Your Transmission Running Right With Newnum and Sons Garage If you are unsure when you last had a fluid change or want a technician to inspect your transmission, Newnum and Sons Garage in Covington is ready to help.  Our team can walk you through the service section of your vehicle’s maintenance schedule, recommend changing intervals based on how you actually drive, and handle everything from a simple drain and fill to full transmission repair. Call them at 765-793-3334 to get started.  Protecting your transmission today means fewer surprises and more peace of mind on the road tomorrow.

How Often To Change Transmission Fluid For A Smoother, Longer-Lasting Ride Read More »
How Often To Change Brake Fluid: A Simple Guide For Safer Driving

How Often To Change Brake Fluid: A Simple Guide For Safer Driving

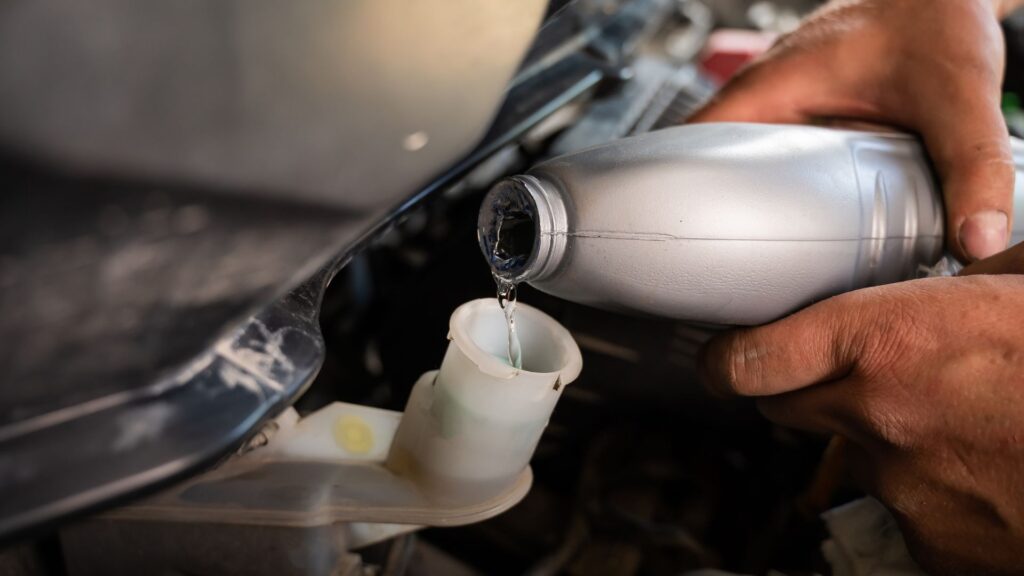
How Often To Change Brake Fluid: A Simple Guide For Safer Driving Most drivers think about oil changes, tire rotations, and brake pads – but brake fluid? That one tends to fly under the radar. The truth is, knowing how often to change brake fluid could be one of the most important things you do for your vehicle’s safety. Let us break it down in plain terms so you know exactly what to watch for and when to act. What Brake Fluid Actually Does Brake fluid is a hydraulic fluid that plays a critical role every time you press the brake pedal.  When you press the pedal, the fluid converts your foot’s force into pressure that travels through the brake line to engage your front and rear brakes – whether disc brake calipers or drum-style setups. Without clean, functioning fluid, that hydraulic brake system simply cannot work as intended. It is what connects your intention to slow down with the actual mechanical action that stops your car. Why Brake Fluid Needs to Be Changed Over Time Here is something most people do not know: brake fluid is hygroscopic. That means it naturally absorbs moisture from the surrounding air over time – humidity, condensation, and everyday temperature changes all contribute. As brake fluid absorbs water, two big problems develop. First, water in the fluid lowers the boiling point of the brake fluid, which means under hard braking or hot conditions, the fluid might actually boil. Boiling brake fluid becomes compressible, which quickly reduces braking performance. Second, water in the system can cause internal corrosion, damaging the master cylinder, caliper, and other system components. This is why fluid should be changed on a regular schedule – not just when something feels wrong. How Often Should You Change Brake Fluid? The general recommendation from most experts is to change your brake fluid every two years, regardless of mileage. Some manufacturers extend that to every three years, and others may recommend a fluid change based on mileage alone. Your owner’s manual is the best starting point for your specific vehicle. For example, Toyota recommends changing the brake fluid every 3 years under normal driving conditions. Always check your manufacturer’s recommendations because there is no single answer that fits every car. A good rule of thumb: think of it the way you think about your oil change schedule. You set a reminder, and you stick to it – do the same for brake fluid. Signs Your Brake Fluid Needs to Be Changed Beyond following a maintenance schedule, there are real-world signs that your fluid needs attention. Watch out for these: Spongy or soft pedal feel – If it feels like the pedal goes further than usual before the brakes engage, that is a warning sign. Brakes feel less responsive – If you need to press the pedal harder than normal to slow down, degraded fluid could be the reason. Burning smell after braking – Overheated fluid during heavy braking can produce a noticeable odor. Low brake fluid – If your brake fluid is low in the reservoir, it may indicate a leak or that fluid has been consumed by worn brake pads. Dark or discolored fluid – Fresh brake fluid is light yellow. Dark, murky fluid is a clear sign it is time for a flush. Do not wait until brake failure becomes a real risk. These warning signs exist for a reason. Is Changing Brake Fluid Really Necessary? This is a fair question, and the honest answer is yes – it really is necessary. Some people skip it for years and never notice a problem until they do. By then, the damage can cost several hundred dollars to repair, especially if corrosion has affected the brake line, bleeder valves, or caliper seals. A brake fluid flush, on the other hand, is a relatively simple service that costs less than most people expect. It removes the old fluid from the reservoir and fluid lines, then replaces it with fresh fluid that restores your car’s full brake system performance. Preventing damage before it starts is always the smarter move. How Technicians Test Brake Fluid If you are unsure whether your fluid needs attention, a technician can test it quickly. There are two common methods. A digital tester can measure the moisture content in the fluid and give you a reading on how much water is in the fluid. There are also test strips that check copper levels in the fluid – high copper levels indicate the fluid has broken down and is causing internal corrosion. Both methods give a fast, reliable read on whether changing the brake fluid is something you need to do now or can wait on. Either way, it is a smart thing to request during any routine service visit. What Happens During a Brake Fluid Flush During a brake fluid flush, a technician drains the old hydraulic fluid from the entire system – including the master cylinder, fluid lines, and front and rear brakes. Fresh fluid is then pushed through the system, ensuring no old or contaminated fluid remains. This process is different from simply topping off a low brake fluid level. A full flush every two years keeps the entire brake system in good shape and protects the vehicle’s components from moisture-related wear. When to Talk to a Professional If you are not sure when your brake fluid was last changed, that is reason enough to have it checked. A visual inspection of the brake fluid reservoir takes about 30 seconds, and a moisture test with a tester adds only a couple of minutes. The need to change your brake fluid depends on your driving habits, your vehicle’s age, and the climate you drive in. A trusted mechanic can look at all of that and give you a straight answer. Conclusion Brake fluid is easy to forget, but it plays a direct role in keeping you safe every time you drive.  Changing the brake fluid every two years – or

How Often To Change Brake Fluid: A Simple Guide For Safer Driving Read More »

What Causes a Car to Overheat? Warning Signs and Prevention

What Causes a Car to Overheat? Warning Signs and Prevention

What Causes a Car to Overheat? Warning Signs and Prevention Few driving situations are more stressful than watching your temperature gauge rise toward the red zone. If your car is overheating, it is more than an inconvenience. It is a warning sign that the engine or cooling system needs attention. Understanding what causes a car to overheat can help you recognize warning signs early, avoid additional engine damage, and know when it is time to schedule professional service. How Your Car’s Cooling System Works Your engine generates significant heat while it runs. The cooling system helps control that heat so the engine can operate safely and efficiently. Coolant circulates through the engine, absorbs heat, and carries it to the radiator. The radiator then releases heat into the surrounding air before the coolant cycles back through the engine. Components such as the thermostat, water pump, radiator, cooling fan, hoses, and radiator cap all help this process work properly. If one of these components fails or the system loses coolant, the engine temperature can begin to rise. Common Reasons for Car Overheating Several cooling-system or engine-related problems can cause a vehicle to overheat. Here are six common causes to watch for. 1. Low Coolant Levels Low coolant is one of the most common causes of engine overheating. When there is not enough coolant in the system, heat may not be carried away from the engine effectively. Low coolant may be caused by a leak, improper refill, or another cooling-system problem that should be inspected. You may notice a puddle beneath the vehicle, dried coolant residue, a sweet smell under the hood, or a warning light on the dashboard. Never ignore signs of coolant loss. Even a small leak can eventually lead to overheating and more serious repairs. 2. A Failing Water Pump The water pump circulates coolant through the engine and radiator. If the pump fails or becomes less effective, coolant may not move through the system properly, allowing engine temperature to rise. A failing water pump may be associated with coolant leaks, unusual noises near the front of the engine, or repeated overheating. Because the water pump plays a critical role in coolant circulation, it should be inspected promptly when problems appear. 3. Thermostat Failure The thermostat regulates coolant flow between the engine and radiator based on temperature. When the engine is warming up, the thermostat remains closed. Once the engine reaches normal operating temperature, it opens so coolant can flow through the radiator. If the thermostat becomes stuck closed, coolant may not flow properly through the radiator, causing the engine to overheat quickly. A faulty thermostat can be a relatively small repair, but ignoring the problem may lead to significant engine damage. 4. Radiator or Cooling Fan Problems The radiator helps release heat from the coolant before it returns to the engine. A leaking radiator, clogged radiator core, damaged radiator cap, or faulty cooling fan can interfere with that process. Cooling fan problems may become especially noticeable while idling or driving in slow traffic, when airflow through the radiator is limited. Radiator leaks or internal blockages can also reduce the cooling system’s ability to manage engine temperature. 5. Leaking or Damaged Coolant Hoses Coolant travels through hoses that connect major parts of the cooling system. Over time, hoses can crack, loosen, soften, or deteriorate. A damaged hose can allow coolant to escape, reducing the system’s ability to control engine temperature. Regular inspections can help identify worn hoses before they fail and leave you dealing with an overheated vehicle. 6. Low Engine Oil Engine oil primarily lubricates moving engine components, but it also helps reduce friction and manage heat. If the oil level becomes too low, internal friction can increase and contribute to higher engine temperatures. Low oil is not always the cause of overheating, but it is another important warning sign that should be checked during an inspection. Warning Signs Your Car May Be Overheating An overheating engine may give you warning signs before serious damage occurs. Watch for: A temperature gauge rising toward the hot or red zone A temperature warning light on the dashboard Steam coming from beneath the hood A sweet coolant smell Visible coolant beneath the vehicle Reduced engine performance Unusual gurgling or boiling sounds If you notice these warning signs, take action promptly rather than continuing to drive. What to Do When Your Engine Is Overheating If your vehicle begins overheating while you are driving, remain calm and focus on reaching a safe location. Pull over safely as soon as possible. Turn off the engine after you have stopped. Keep clear of steam coming from beneath the hood. Never remove the radiator cap or pressurized coolant cap while the engine is hot. Allow the vehicle to cool before checking the coolant reservoir. Arrange for professional assistance if the cause is unknown or the vehicle continues to overheat. Do not continue driving an overheated vehicle. Continued operation can damage the head gasket, warp the cylinder head, or cause other costly engine damage. How to Help Prevent Car Overheating Preventive maintenance can help reduce the risk of engine overheating and unexpected breakdowns. Check your coolant level according to your vehicle manufacturer’s recommendations, and use the correct coolant mixture for your vehicle. If the coolant level drops repeatedly, schedule an inspection rather than simply topping it off again. It is also important to have the cooling system inspected for worn hoses, leaks, radiator concerns, water pump problems, thermostat failure, and cooling fan issues. Your vehicle’s recommended maintenance schedule can help determine when coolant replacement or cooling-system service is needed. Keeping an eye on the temperature gauge, especially during hot weather or heavy traffic, can also help you recognize problems before the engine becomes severely overheated. Schedule Cooling System Service in Covington, IN Engine overheating is a serious concern, but many cooling-system problems can be addressed before they lead to major engine damage. Whether your vehicle has low coolant, a failing thermostat, radiator trouble, worn hoses, or water

What Causes a Car to Overheat? Warning Signs and Prevention Read More »

Bad Car Thermostat Symptoms: 7 Warning Signs You Shouldn’t Ignore

Bad Car Thermostat Symptoms: 7 Warning Signs You Shouldn’t Ignore

Bad Car Thermostat Symptoms: 7 Warning Signs You Shouldn’t Ignore Your car’s thermostat is a small but important part of the cooling system. It helps regulate coolant flow between the engine and radiator so the engine can reach and maintain a proper operating temperature. When the thermostat fails, your vehicle may begin showing signs such as overheating, weak cabin heat, unusual temperature readings, or reduced fuel efficiency. Recognizing the common signs of a bad thermostat may help you address cooling-system problems before they lead to more serious engine damage. What Does a Car Thermostat Actually Do? The thermostat controls coolant flow based on engine temperature. When the engine is cold, the thermostat remains closed so the engine can warm up efficiently. Once the engine reaches its normal operating temperature, the thermostat opens and allows coolant to travel through the radiator, where heat is released before the coolant circulates back through the engine. The thermostat functions as a temperature-controlled valve. As coolant warms, its internal element helps open the valve so coolant can flow through the radiator. If the thermostat becomes stuck open, stuck closed, or fails to operate correctly, engine temperature can become difficult to regulate. 7 Bad Car Thermostat Symptoms to Watch For 1. Your Temperature Gauge Fluctuates One possible sign of a faulty thermostat is an unusual temperature gauge reading. You may notice the gauge climbing higher than normal, staying unusually low, or changing repeatedly while you drive. A properly operating thermostat helps keep engine temperature within a stable range. When that temperature becomes inconsistent, the thermostat or another cooling-system component may need attention. 2. Your Engine Overheats Quickly If your engine overheats soon after you begin driving, the thermostat may be stuck closed. In this position, coolant may not circulate properly through the radiator, causing heat to build up quickly inside the engine. Engine overheating should never be ignored. Excessive heat can damage gaskets, warp engine components, and lead to more expensive repairs. If your temperature warning light comes on or the gauge enters the hot range, pull over safely, turn off the engine, and arrange for an inspection before continuing to drive. 3. Your Engine Runs Too Cold A thermostat that is stuck open can allow coolant to circulate before the engine reaches its proper operating temperature. As a result, the engine may take too long to warm up or may continue running cooler than normal. An engine that does not reach normal operating temperature may operate less efficiently and use more fuel. You may also notice that the temperature gauge remains lower than usual during normal driving. 4. Your Heater Blows Lukewarm or Cold Air Your vehicle’s cabin heater relies on heat from the engine coolant. If the thermostat is stuck open and the engine does not warm up properly, the heater may blow lukewarm or cold air instead of producing steady heat. This symptom may become especially noticeable during colder weather, when the cabin heater struggles to warm the vehicle interior. Weak heat can also result from low coolant, heater core problems, or other cooling-system concerns, so an inspection is the best way to determine the actual cause. 5. You Notice Coolant Leaks Near the Thermostat Housing Coolant near the thermostat housing may indicate a failed gasket, worn seal, cracked housing, or another nearby cooling-system problem. You may notice a puddle beneath the vehicle, dried coolant residue around the housing, a sweet smell after driving, or a low coolant warning light. A coolant leak should never be ignored. Low coolant can reduce the system’s ability to control engine temperature and may lead to overheating. 6. You Hear Gurgling or Boiling Sounds Gurgling or boiling sounds may occur when an engine is overheating or when coolant is not circulating properly. In some cases, a thermostat problem may contribute to these symptoms. However, unusual cooling-system noises may also be related to low coolant, trapped air, a coolant leak, radiator problems, or a failing water pump. A technician can inspect the system and identify the source of the noise. 7. Your Fuel Economy Drops Without an Obvious Reason If the thermostat is stuck open and the engine remains too cool, fuel efficiency may decrease. The vehicle may use more fuel because the engine is not operating within its intended temperature range. Although poor fuel economy can have several causes, a low temperature gauge reading combined with weak cabin heat and reduced mileage may point to a thermostat or cooling-system issue. When to Consider Thermostat Replacement If you are noticing one or more of these symptoms, schedule an inspection of your thermostat and cooling system. Thermostat replacement is often a manageable repair, but delaying service can allow overheating or coolant-loss problems to become more serious. A professional inspection can help determine whether the concern is caused by the thermostat, coolant level, thermostat housing, radiator, water pump, heater core, or another part of the cooling system. Get Trusted Auto Repair Services in Covington, IN At Newnum & Sons Garage, our technicians can inspect your cooling system, diagnose thermostat-related concerns, and recommend the appropriate repair. Whether your vehicle is overheating, running too cold, losing coolant, or producing weak cabin heat, we can help identify the source of the problem. Schedule Cooling System Service Today A faulty thermostat can lead to overheating, poor heater performance, reduced fuel efficiency, and possible engine damage when left unaddressed. If your temperature gauge is behaving unusually or your vehicle is showing signs of a cooling-system problem, schedule an inspection promptly. Call 765-793-3334 to schedule thermostat or cooling-system service with Newnum & Sons Garage in Covington, IN.

Bad Car Thermostat Symptoms: 7 Warning Signs You Shouldn’t Ignore Read More »

What to Do When Your Brake Pedal Travels to the Floor While Driving

What to Do When Your Brake Pedal Travels to the Floor While Driving

What to Do When Your Brake Pedal Travels to the Floor While Driving Few driving situations are more alarming than pressing the brake pedal and feeling it sink toward the floor. Whether the pedal drops suddenly or gradually feels lower than usual, it is not a problem to ignore. A low or sinking brake pedal can indicate that your braking system is no longer operating safely. This guide explains what may cause a brake pedal to go to the floor, what to do if it happens while driving, and when to seek professional brake service. What It Means When the Brake Pedal Goes to the Floor Most vehicle braking systems rely on hydraulic pressure. When you press the brake pedal, brake fluid moves through the brake lines and helps the calipers or wheel cylinders apply the brakes at the wheels. If the system loses hydraulic pressure, the pedal may travel farther before the brakes fully engage. In severe cases, the vehicle may have significantly reduced stopping power. A brake pedal that sinks to the floor often indicates a brake fluid leak, air in the lines, a failing master cylinder, or another issue that requires immediate inspection. Common Causes of a Brake Pedal Sinking to the Floor Brake Fluid Leak One of the most common causes of a brake pedal sinking to the floor is a brake fluid leak. Fluid can leak from a brake line, hose, caliper, wheel cylinder, master cylinder, or reservoir connection. When brake fluid escapes and air enters the system, the air compresses more easily than brake fluid. This can make the pedal feel soft, spongy, or unusually low. You may notice fluid near a wheel or underneath the engine bay. However, not every leak is visible. An internal master cylinder leak, for example, may cause pedal problems without leaving a puddle on the ground. Failing Master Cylinder The brake master cylinder converts pressure from your foot into hydraulic pressure that operates the brakes. If its internal seals wear out or fail, brake fluid may move past the seals instead of building the pressure needed for effective braking. This can cause the pedal to sink toward the floor even when the brake fluid reservoir appears full. A failing master cylinder may need to be replaced. Because the braking system directly affects vehicle safety, this repair should be handled by a trained technician. Air in the Brake Lines Air in the brake lines can make the pedal feel soft or spongy and increase the amount of pedal travel before the brakes respond. This may happen after brake work if the system was not properly bled, or after a leak or opened brake line allowed air into the system. Bleeding the brakes removes trapped air and helps restore proper pedal feel, but the source of the air should also be identified and repaired. Worn or Misadjusted Brake Components Worn brake pads, worn brake shoes, or poorly adjusted rear drum brakes may contribute to increased pedal travel and reduced braking performance. Even when these parts are not the only cause of a low pedal, worn components can reduce braking effectiveness and should be addressed promptly. A complete brake inspection can determine whether pads, shoes, rotors, drums, calipers, or related hardware need service. ABS or Hydraulic Control System Problems In some vehicles, an ABS pump or another hydraulic control system fault can contribute to unusual pedal behavior. These issues may require diagnostic equipment to identify properly. If the ABS warning light is on or the pedal feels inconsistent, a technician can inspect the system and check for stored fault codes. What About a Hard Brake Pedal? A brake pedal that is hard to press is different from a pedal that sinks to the floor. A hard pedal may be related to the brake booster or another power-assist issue. Both symptoms require attention, but they usually point to different problems. If your pedal is hard, low, spongy, or inconsistent, have the brake system inspected as soon as possible. What to Do If the Brake Pedal Goes to the Floor While Driving If your brake pedal suddenly goes to the floor while you are driving, focus on slowing the vehicle and reaching a safe stopping location. Stay calm and keep control of the vehicle. Avoid abrupt steering movements. Take your foot off the accelerator. Allow the vehicle to begin slowing down. Turn on your hazard lights when it is safe to do so. This helps alert nearby drivers. Try pumping the brake pedal a few times. In some situations, this may temporarily restore enough pressure to help slow the vehicle. Gradually shift to a lower gear when your vehicle allows it. Engine braking may help reduce speed. Avoid sudden downshifts. Apply the parking brake carefully and gradually if needed. Applying it too quickly may cause the rear wheels to lock and the vehicle to skid. Steer to a safe location and stop the vehicle. Once stopped, do not continue driving. Arrange for a tow and a professional inspection. A vehicle with a sinking brake pedal should not be driven until the cause has been identified and repaired. Always follow the emergency guidance in your vehicle owner’s manual, as brake and parking brake systems can differ by vehicle. Get Your Brakes Inspected Before the Problem Gets Worse A brake pedal that feels soft, low, or inconsistent is a warning sign that should not be ignored. Even if the brakes still appear to work, the problem may worsen without warning. A brake inspection can help identify fluid leaks, master cylinder issues, worn brake components, air in the hydraulic system, or other problems affecting your stopping ability. Schedule Brake Service in Covington, IN A brake pedal that travels to the floor is a serious safety concern that requires prompt attention. Whether the cause is a brake fluid leak, air in the lines, a failing master cylinder, or worn brake components, the next step is a professional inspection. At Newnum & Sons Garage in Covington, IN,

What to Do When Your Brake Pedal Travels to the Floor While Driving Read More »

7 Signs of a Bad Clutch Master Cylinder You Shouldn't Ignore

7 Signs of a Bad Clutch Master Cylinder You Shouldn’t Ignore

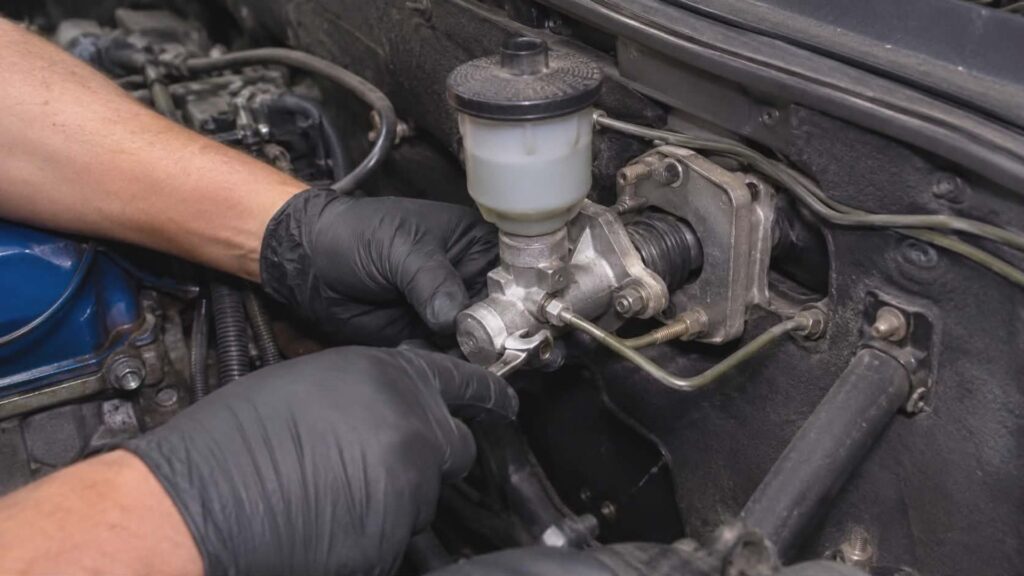
7 Signs of a Bad Clutch Master Cylinder You Shouldn’t Ignore If you drive a vehicle with a manual transmission, the clutch system plays an essential role in keeping you in control. At the center of the hydraulic clutch system is the clutch master cylinder, a small but important component that converts pressure from your foot into hydraulic force. When the clutch master cylinder begins to fail, shifting gears can become difficult or unpredictable. The symptoms may appear gradually, making them easy to overlook until the vehicle becomes harder or unsafe to drive. Here are seven signs of a bad clutch master cylinder that should not be ignored. How the Clutch Hydraulic System Works When you press the clutch pedal, the clutch master cylinder pushes hydraulic fluid through the clutch line to the slave cylinder. The slave cylinder then helps activate the clutch release mechanism, allowing the clutch to disengage so you can shift gears smoothly. Because this is a hydraulic system, each component must work properly. A worn seal, damaged line, leaking cylinder, or low fluid level can reduce pressure and affect clutch operation. 1. The Clutch Pedal Feels Soft or Spongy One of the earliest warning signs is a clutch pedal that feels soft or spongy when pressed. A properly working pedal should provide consistent resistance. A spongy pedal may indicate air in the hydraulic system, low fluid, or worn internal seals. Unlike hydraulic fluid, air compresses easily. When air enters the system, the clutch pedal may feel mushy and fail to transfer pressure effectively. Bleeding the hydraulic system may temporarily improve pedal feel in some cases. However, when the problem returns, a leak or failing component may need professional attention. 2. The Clutch Pedal Sinks to the Floor A clutch pedal that sinks to the floor or fails to return is a serious warning sign. This can happen when the master cylinder is no longer able to maintain enough hydraulic pressure to operate the clutch properly. When the clutch cannot disengage, shifting gears may become extremely difficult or impossible. If your clutch pedal suddenly stays on the floor, avoid continuing to drive the vehicle and arrange for an inspection. 3. Difficulty Shifting Gears When the clutch master cylinder cannot generate sufficient pressure, the clutch may not fully disengage when you press the pedal. As a result, shifting gears may feel stiff, difficult, or inconsistent. You may especially notice problems when shifting into first gear, reverse, or between gears while driving. Because several clutch and transmission issues can cause shifting problems, a technician should inspect the hydraulic system before recommending repairs. 4. Grinding When Trying to Shift Grinding noises while shifting can occur when the clutch is not fully disengaged. If the master cylinder is failing, the clutch may remain partially engaged even when the pedal is pressed. Grinding should not be ignored because repeated rough shifting can contribute to additional wear on transmission components. A professional inspection can help determine whether the issue is hydraulic or caused by another clutch or transmission problem. 5. Clutch Fluid Leaks The clutch master cylinder relies on a sealed hydraulic system. When internal seals wear out or the cylinder becomes damaged, hydraulic fluid may begin to leak. Depending on your vehicle, you may notice fluid: Near the clutch pedal inside the cabin Around the firewall where the master cylinder is mounted In or near the clutch fluid reservoir Under the vehicle near the slave cylinder or bell housing area Low fluid can reduce hydraulic pressure and cause the clutch system to stop working correctly. Because some vehicles share a fluid reservoir between the clutch and brake systems, check your owner’s manual or have a technician inspect the vehicle promptly. 6. The Clutch Pedal Sticks or Returns Slowly A clutch pedal that sticks, hesitates, or slowly returns to its normal position may indicate a hydraulic problem. Internal wear in the master cylinder, damaged seals, contaminated fluid, or a related component issue can interfere with smooth pedal operation. This symptom may become more noticeable in stop-and-go traffic, where frequent clutch use is required. When the pedal no longer responds normally, scheduling an inspection early can help prevent a more disruptive failure. 7. Low or Discolored Clutch Fluid Check the clutch fluid reservoir if it is accessible and safe to inspect. Fluid that repeatedly drops below the recommended level may indicate a leak somewhere in the hydraulic system. Discolored or contaminated-looking fluid may also signal that the system needs service. However, dark fluid alone does not confirm that the clutch master cylinder is faulty. A technician can inspect the master cylinder, slave cylinder, lines, and fluid condition to identify the actual cause. Is It the Master Cylinder or the Slave Cylinder? A failing clutch master cylinder and a failing slave cylinder can produce similar symptoms. Both may cause a soft pedal, fluid loss, difficulty shifting, or an inability to disengage the clutch. A master cylinder leak may be visible near the clutch pedal, reservoir, or firewall. A slave cylinder issue may appear closer to the transmission or bell housing area, depending on the vehicle’s design. Because these symptoms overlap, replacing parts without a proper diagnosis can lead to unnecessary costs. A qualified technician can inspect the hydraulic clutch system and identify which component needs attention. Do Rising RPMs Mean the Master Cylinder Is Bad? When engine RPMs increase without a matching increase in speed, the clutch may be slipping. This is commonly associated with a worn clutch disc, pressure plate, or another clutch assembly problem rather than a failing clutch master cylinder alone. Since clutch symptoms can overlap, it is best to have the vehicle professionally inspected before assuming which part is responsible. Why You Should Not Ignore Clutch Hydraulic Problems A failing clutch master cylinder can leave you unable to shift gears or safely operate your vehicle. What begins as a soft pedal or small fluid leak can eventually become a complete loss of clutch control. Addressing the issue early can help

7 Signs of a Bad Clutch Master Cylinder You Shouldn’t Ignore Read More »

Muffler vs. Resonator: What Is the Difference for Your Car?

Muffler vs. Resonator: What Is the Difference for Your Car?

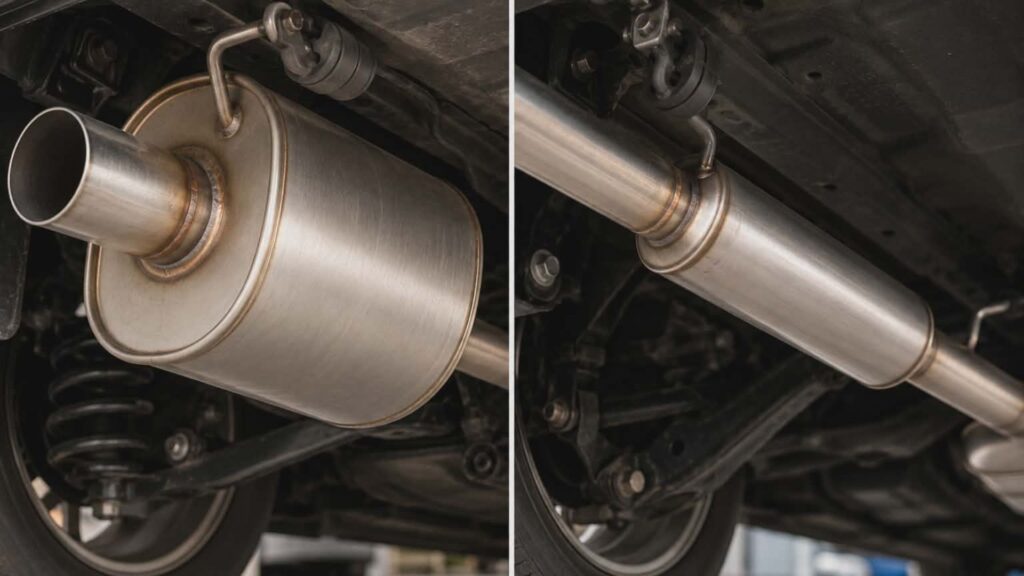
Muffler vs. Resonator: What Is the Difference for Your Car? When comparing a muffler vs. a resonator, it is easy to understand why drivers confuse the two. Both are part of the exhaust system, and both help manage the sound your vehicle produces. However, they do not serve the same purpose. A muffler primarily reduces overall exhaust volume, while a resonator helps control specific tones, such as humming or droning sounds at certain speeds. Understanding the difference can help you make informed decisions when your exhaust system needs repairs or replacement parts. What Does a Muffler Do? The muffler is one of the most recognizable components of a vehicle’s exhaust system. It is generally located near the rear of the vehicle, after the catalytic converter, and its main purpose is to reduce the noise created by exhaust gases leaving the engine. As the engine runs, exhaust gases travel through the exhaust system and eventually reach the muffler. Inside the muffler, chambers, tubes, and sound-absorbing materials help reduce noise before the gases exit through the tailpipe. Without a functioning muffler, your vehicle may sound significantly louder than normal, especially during acceleration. Common Types of Mufflers Different muffler designs can affect both the sound and character of a vehicle’s exhaust. Common types include: Chambered mufflers: These use internal chambers to help reduce sound while often producing a deeper exhaust tone. Straight-through mufflers: Sometimes called glasspacks, these use a perforated tube surrounded by sound-absorbing material to reduce noise while allowing exhaust gases to flow through. Turbo mufflers: These use internal passages and chambers to provide quieter, more refined sound control. The right muffler depends on your vehicle, driving preferences, and whether you want a quieter ride or a more noticeable exhaust tone. What Does a Resonator Do? A resonator is another exhaust system component, but it is not the same as a muffler. It is often installed between the catalytic converter and the muffler, although its location can vary depending on the vehicle. Instead of reducing overall exhaust volume, a resonator is designed to reduce specific sound frequencies. In particular, it may help control the droning or humming sound that can occur while cruising at a steady speed. This type of exhaust drone can become especially noticeable inside the cabin during highway driving. A properly functioning resonator helps smooth out these unwanted tones without dramatically changing the overall volume of the exhaust system. When a resonator is removed or damaged, a vehicle may develop a raspier, harsher, or more noticeable exhaust sound, depending on the overall system design. Do You Need Both a Muffler and a Resonator? Many factory exhaust systems include both a muffler and a resonator because they perform different jobs. The muffler reduces the overall noise level produced by the exhaust system. The resonator helps reduce certain tones or vibrations that may otherwise create an unpleasant sound inside the cabin. Together, these parts can help provide a quieter, smoother driving experience. Removing or replacing either component may change the way your vehicle sounds. In some cases, modifications can also affect how the exhaust system performs, depending on the vehicle and the parts installed. A performance muffler paired with a resonator may create a cleaner exhaust tone without excessive cabin noise. Removing both components, however, may leave your vehicle sounding louder, raspier, or more prone to highway drone. Signs Your Muffler or Resonator May Need Attention Over time, exhaust components can wear out because of heat, moisture, rust, road debris, or physical damage. You may need an inspection if you notice: Louder exhaust noise than usual Rattling or vibrating sounds underneath the vehicle A humming or droning sound at certain speeds Visible rust or corrosion on exhaust components Exhaust odors near or inside the vehicle Changes in vehicle performance or fuel efficiency Exhaust odors inside the cabin should be taken seriously. Because exhaust gases can be hazardous, arrange for a professional inspection promptly if you smell fumes while driving. Muffler vs. Resonator: Which One Is Causing the Problem? Because the muffler and resonator are both parts of the exhaust system, it may be difficult to identify the source of a noise or odor without an inspection. A damaged muffler may cause the vehicle to sound much louder overall. A failing resonator may create rattling, buzzing, or excessive drone at certain speeds. However, similar symptoms can also result from damaged pipes, loose connections, rusted hangers, or leaks elsewhere in the exhaust system. A technician can inspect the system, determine which component is damaged, and recommend the appropriate repair or replacement. Schedule Exhaust System Service in Covington, IN The difference between a muffler and a resonator comes down to purpose. A muffler helps reduce overall exhaust noise, while a resonator helps control specific tones such as drone, hum, or harsh buzzing. When your vehicle starts making unusual noises or producing exhaust odors, do not ignore the problem. The team at Newnum and Sons Garage in Covington, IN, can inspect your exhaust system and recommend the repair your vehicle needs. Call 765-793-3334 to schedule your appointment today.

Muffler vs. Resonator: What Is the Difference for Your Car? Read More »

7 Signs of an Exhaust Leak You Shouldn't Ignore

7 Signs of an Exhaust Leak You Shouldn’t Ignore

7 Signs of an Exhaust Leak You Shouldn’t Ignore Your car or truck may warn you about a problem through unusual sounds, strange odors, or a noticeable drop in performance. When an exhaust leak develops, these symptoms can appear long before the issue becomes more serious. A leak in the exhaust system is more than an inconvenience. It can affect fuel efficiency, allow harmful gases to enter the cabin, and contribute to damage in nearby components over time. Here are seven signs to watch for. 1. Unusual Noises From the Engine or Undercarriage One of the earliest signs of an exhaust leak is an unusual sound. A ticking, hissing, or popping noise, especially during a cold start or while accelerating, may indicate a crack, loose connection, or damaged gasket somewhere in the exhaust system. A ticking or hissing sound near the engine is often associated with the exhaust manifold. When gases escape through a damaged manifold or gasket, the noise may become more noticeable as the engine runs or when you press the accelerator. 2. A Strong Exhaust Smell Inside the Cabin If you smell exhaust fumes inside your car while driving, do not ignore them. This may mean gases are escaping from the exhaust system and entering the passenger area. This warning sign requires prompt attention because vehicle exhaust can contain carbon monoxide, a colorless and odorless gas that can be dangerous in enclosed spaces or at high concentrations. If you notice exhaust odors inside your vehicle, schedule an inspection as soon as possible. 3. Decreased Fuel Efficiency An exhaust system problem can affect how efficiently your engine runs, especially if the leak interferes with sensor readings or overall engine performance. When you begin filling up more often without a change in your usual driving habits, it may be worth having the vehicle inspected. Reduced fuel efficiency can have many causes, but an exhaust issue may be one of them. 4. Visible Soot or Corrosion Near Exhaust Components When the vehicle is off and fully cooled, look for black soot near exhaust joints, gaskets, pipes, or the manifold. Soot buildup can appear near the location where exhaust gases are escaping. Rust and corrosion are also signs to watch for. Moisture, road conditions, and repeated heat exposure can gradually weaken exhaust pipes, the muffler, and related components, increasing the chance of leaks. 5. Vibrations in the Steering Wheel, Pedals, or Floor A damaged exhaust component may cause unusual vibrations that you can feel through the gas pedal, steering wheel, or floor of the vehicle. Larger leaks or loose exhaust parts may create more noticeable shaking or rattling. When your car feels different while idling or driving, an exhaust inspection can help determine whether the system is contributing to the problem. 6. Check Engine Light or Failed Emissions Test Sensors within your vehicle monitor exhaust flow and emissions. When a leak occurs near certain sensors, it can interfere with their readings and cause the check engine light to turn on. An exhaust leak may also contribute to a failed emissions inspection, especially when gases escape before they pass through the catalytic converter. Because the catalytic converter helps reduce harmful emissions, leaks ahead of it can lead to higher pollution levels. 7. Rough Idling or Poor Engine Performance A leak near the exhaust manifold or gasket can affect engine performance. You may notice a rough idle, hesitation during acceleration, reduced power, or a general sense that the vehicle is not running as smoothly as it should. Addressing exhaust problems early can help prevent a minor repair from becoming a more expensive issue involving additional components. How to Identify a Possible Exhaust Leak at Home A basic visual inspection may help you spot warning signs before visiting a repair shop. With the engine turned off and fully cooled, look for visible soot, cracks, rust, or loose connections around accessible exhaust components. Avoid touching exhaust parts until they are completely cool, as they can become extremely hot. Do not crawl underneath a running vehicle or attempt repairs without the proper equipment and experience. Because exhaust leaks can be difficult to locate and may involve harmful gases, a professional inspection is often the safest way to confirm the source of the problem and complete the necessary repair. Schedule an Exhaust Inspection in Covington, IN When you notice any of these signs, do not put off an inspection. A small exhaust leak can become a larger and more expensive repair when left unaddressed. The team at Newnum and Sons Garage in Covington, IN, can diagnose exhaust system problems and recommend the appropriate repair for your vehicle. Call 765-793-3334 or visit newnumsgarage.com to schedule your auto repair appointment and get back on the road with confidence.

7 Signs of an Exhaust Leak You Shouldn’t Ignore Read More »

10 Rough Idle Causes and How to Fix Each One Fast

10 Rough Idle Causes and How to Fix Each One Fast

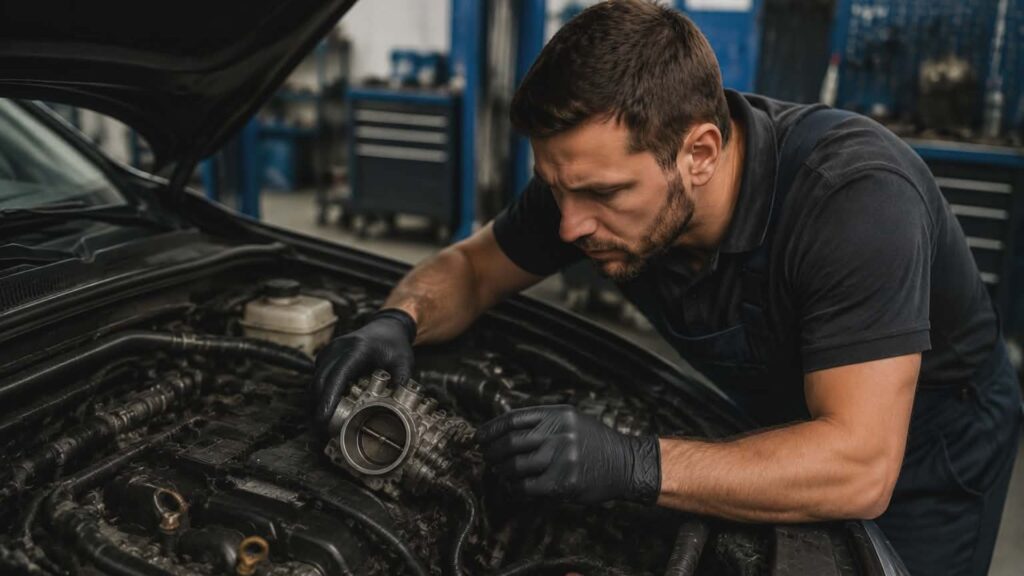
10 Rough Idle Causes and How to Fix Each One Fast Most vehicles idle between 600 and 1,000 RPM when sitting still. When your car starts shaking, the RPM needle bounces, or the engine feels like it might stall, something is clearly off. A rough idle is one of the most common engine problems drivers deal with, and the good news is that most causes are fixable once you know what you are looking for. Here is a breakdown of the most common causes of rough idle and what you can do about each one. What Does a Rough Idle Actually Mean? When a car engine is running smoothly, you barely notice it. The internal combustion engine fires in a steady rhythm, the air-fuel mixture burns cleanly in each cylinder, and the car sits quietly at a low RPM. When something disrupts that rhythm – whether it is too much air, not enough fuel, or a misfiring engine – the engine idle becomes uneven. You might feel a vibration through the seat, notice the RPM dipping too low, or watch the check engine light flick on. Common Causes of Rough Idle and How to Fix Them Worn or Fouled Spark Plugs A bad spark plug is one of the most common causes drivers overlook. The spark plug ignites the air-fuel mixture inside the cylinder, and when it is worn, cracked, or covered in carbon buildup, it misfires. A misfire means one or more cylinders are not firing properly, which causes the engine to idle roughly and shake. Fix: Replace spark plugs according to your vehicle’s maintenance schedule. Most plugs last 30,000 to 100,000 miles, depending on the type. If you are noticing ignition problems alongside a rough idle, start here. Vacuum Leak The intake manifold and various hoses throughout the engine bay carry air and fuel into the combustion chamber. When a gasket cracks or a hose comes loose, a vacuum leak lets unmetered air sneak into the engine. This throws off the air-fuel ratio and causes the engine to idle roughly at low RPM. Fix: Listen for a hissing sound near the intake manifold or throttle area. A vacuum leak is best diagnosed with a smoke test or by spraying carburetor cleaner near suspected spots while the engine is running. Dirty or Clogged Fuel Injectors Fuel injectors spray a precise amount of fuel into each cylinder. Over time, dirty fuel or carbon buildup can clog them, disrupting the air-fuel mixture and causing a misfire. When one or more fuel injectors are not flowing correctly, it becomes almost unavoidable for the engine to run rough. Fix: Use a quality fuel injector cleaner or have the injectors professionally cleaned or replaced. This is especially important if you notice the issue gets worse on cold starts. Dirty Throttle Body The throttle body controls how much air enters the engine. When carbon and grime coat the inside of the throttle body, it restricts airflow and messes with the engine’s idle speed. A dirty throttle body is a surprisingly common cause of rough idle, especially on higher-mileage vehicles. Fix: Cleaning the throttle body with a dedicated cleaner is a straightforward fix. It is part of routine tune-up service and can restore smooth idling quickly. Faulty Mass Airflow Sensor The mass airflow sensor measures the amount of air entering the engine and sends that data to the engine control unit. If this sensor is dirty or failing, the engine receives incorrect airflow readings and cannot properly calculate the right amount of fuel to inject. The result is an unstable or low RPM idle. Fix: Cleaning the mass airflow sensor with sensor-safe spray often resolves the issue. If the sensor has failed entirely, replacement is necessary. A check engine light is a common warning sign here. Bad Oxygen Sensor The oxygen sensor monitors exhaust gases leaving the engine and helps balance the air-fuel mixture in real time. A failed sensor sends incorrect readings, causing the engine to run either too rich or too lean. Either condition can cause the engine to idle roughly, reduce fuel economy, and trigger the check engine light. Fix: Check for diagnostic trouble codes using a scan tool. If the oxygen sensor is the culprit, replacing it is a straightforward repair that restores proper engine performance. Restricted Fuel Filter or Weak Fuel Pump A restricted fuel filter or failing fuel pump reduces fuel pressure in the fuel delivery system, starving the engine of the fuel it needs to idle smoothly. When fuel delivery is inconsistent, the engine hesitates, stumbles, or may even stall at idle. Fix: Replace the fuel filter on schedule and have the fuel pump tested if you suspect weak fuel pressure. Neglecting this can cause the engine to stall and lead to more serious engine damage over time. If your car dies at a stop, learn more about why your car stalls when stopping. EGR Valve Problems The exhaust gas recirculation (EGR) valve recirculates a portion of exhaust gas back into the intake manifold to reduce emissions. When the valve gets clogged or sticks open, it disrupts combustion and causes a rough idle, especially at low RPM. This is a common issue in both gasoline and diesel vehicles. Fix: Inspect and clean the EGR valve, or replace it if it is failing. A check engine light code related to the EGR system will help confirm the diagnosis. Low Compression Low compression in one or more cylinders is a more serious cause of a rough idle. It can result from worn piston rings, a damaged valve, or a blown head gasket. When a cylinder cannot build enough compression, combustion is incomplete, and the engine shakes noticeably at idle. Fix: A compression test will confirm low compression. Depending on the cause, repairs can range from a valve adjustment to a full engine rebuild. This is a job for a professional. If you are dealing with these kinds of engine problems, check out the professional engine repair services at Newnum and

10 Rough Idle Causes and How to Fix Each One Fast Read More »

Solid Check Engine Light vs Flashing: What Each Signal Really Means for Your Car

Solid Check Engine Light vs Flashing: What Each Signal Really Means for Your Car

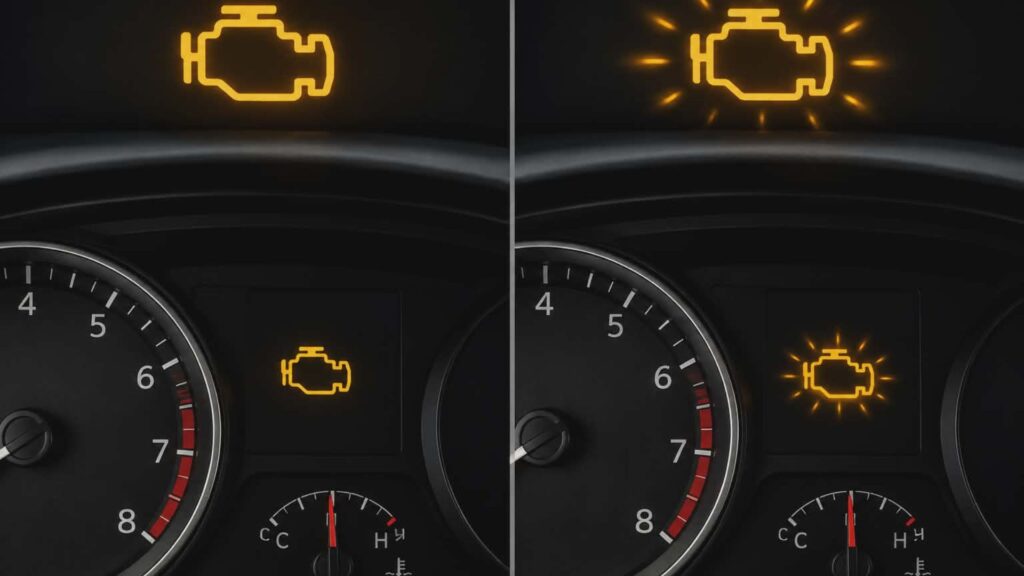
Solid Check Engine Light vs Flashing: What Each Signal Really Means for Your Car That little amber glow on your dashboard can trigger a wave of panic – or, for some drivers, a shrug and a “I’ll deal with it later.” But here is the truth: not all check engine lights are created equal. The difference between a flashing and a solid signal matters more than most people think Let us break it all down in plain language so you know exactly what your car is trying to tell you. What Is the Check Engine Light, Anyway? The check engine light is part of your car’s onboard diagnostics system, also known as OBD-II. When something goes wrong with your engine, exhaust system, sensors, or other key components, the car’s diagnostic system detects it and stores diagnostic trouble codes. The light on the dashboard is simply the vehicle’s way of saying, “Hey, something needs attention.” The challenge is that one symbol covers a huge range of problems – from something as minor as a loose gas cap to something as serious as engine damage. That is why the way the light behaves matters so much. Understanding the Difference: Solid vs Flashing Understanding check engine light behavior starts with one key difference: is the light steady, or is it blinking? What a Solid Check Engine Light Means A steady check engine light illuminates when the car’s computer has detected an issue that needs attention, but is not necessarily causing immediate harm to your vehicle right now. The solid check engine light indicates a problem worth investigating, but it is generally not a “pull over immediately” situation. A solid light might be triggered by things like: A loose gas cap allows fuel vapors to escape A faulty oxygen sensor affects the air-fuel ratio A failing mass flow sensor is causing poor fuel economy Issues with the exhaust gas recirculation valve Minor engine sensor failures Spark plug or ignition coil wear A steady check engine light is still a warning light. Ignoring it for weeks or months can allow a minor engine issue to grow into something far more serious and costly. What a Flashing Check Engine Light Means A flashing check engine light is a different story entirely. When the light is blinking, your car is not just asking for attention – it is demanding immediate action. A blinking check engine light typically signals an active engine misfire, meaning one or more cylinders are not firing correctly during the combustion cycle. Here is why that is so urgent: when a misfire happens, raw fuel and unburned fuel pass through the combustion chamber and enter the exhaust system. This raw fuel can quickly overheat and damage the catalytic converter – one of the most expensive components in your vehicle’s emissions control system. Replacing a catalytic converter is rarely cheap, and continuing to drive with a flashing check engine light dramatically increases the risk of turning a manageable repair into a catastrophic engine problem. If you see a check engine light flashing, the right move is to stop driving as soon as it is safe to do so and call a mechanic. Common Causes Behind Check Engine Light Issues Both types of check engine lights can be triggered by a wide range of issues. Here is a closer look at what commonly triggers the check engine light in each scenario. Common Causes of a Steady Check Engine Light The steady check engine light appears most often when a sensor or non-critical system sends a fault signal to the car’s computer. An oxygen sensor that is reading the exhaust gas incorrectly is one of the most common causes. Other triggers include problems with the ignition system, a failing spark plug, a cracked or worn gasket, or even a loose gas cap that allows pressure to escape from the fuel system. Issues with the transmission, throttle position, variable valve timing, or even a failing vehicle battery can also trigger a solid check engine light. The car is still drivable in most cases, but you should schedule a diagnostic check soon. Common Causes of a Flashing Check Engine Light A flashing CEL almost always points to an engine misfire. The misfire might be caused by a worn spark plug that is no longer creating a clean ignition, a bad ignition coil that is not delivering enough energy to the combustion chamber, or a fuel injection problem that is disrupting the proper air-fuel ratio. In some cases, a flashing check engine light can also signal issues with engine compression, a timing belt problem, or head gasket failure. These are all situations where fuel entering the exhaust can cause serious and rapid damage. A mechanic needs to look at this immediately. Solid and Flashing Check Engine Light: How to Respond Understanding check engine light behavior is only useful if you know what to do next. If the light is solid: Schedule an appointment with a mechanic as soon as you reasonably can. You do not need to abandon your car on the side of the road, but you should not keep ignoring it either. The longer you wait, the higher the risk of an expensive repair. A good rule of thumb is to get it checked within a few days. If the light is flashing: Treat this as an emergency. Reduce your speed, avoid heavy acceleration, and stop driving when safe. The difference between a flashing and a solid light can literally be the difference between a $300 fix and a $2,000 repair. In both cases, getting proper diagnostics done is the only way to know for sure what you are dealing with. Modern vehicles store specific codes that help technicians pinpoint the exact problem. At Newnum and Sons Garage, the team uses advanced computer diagnostics services to read these codes accurately and explain the findings in plain language before any work begins. Why You Should Never Ignore Check Engine Lights Some drivers see a check engine light and

Solid Check Engine Light vs Flashing: What Each Signal Really Means for Your Car Read More »

Schedule Your Appointment Today

Your Automotive Repair & Maintenance Service Specialist

Schedule

What Our Customers Say

Privacy Policy
Manage Consent Preferences
Do Not Share My Information | Conditions of Use | Notice and Take Down Policy | Website Accessibility Policy
© 2026 The content on this website is owned by us and our licensors. Do not copy any content (including images) without our consent.